
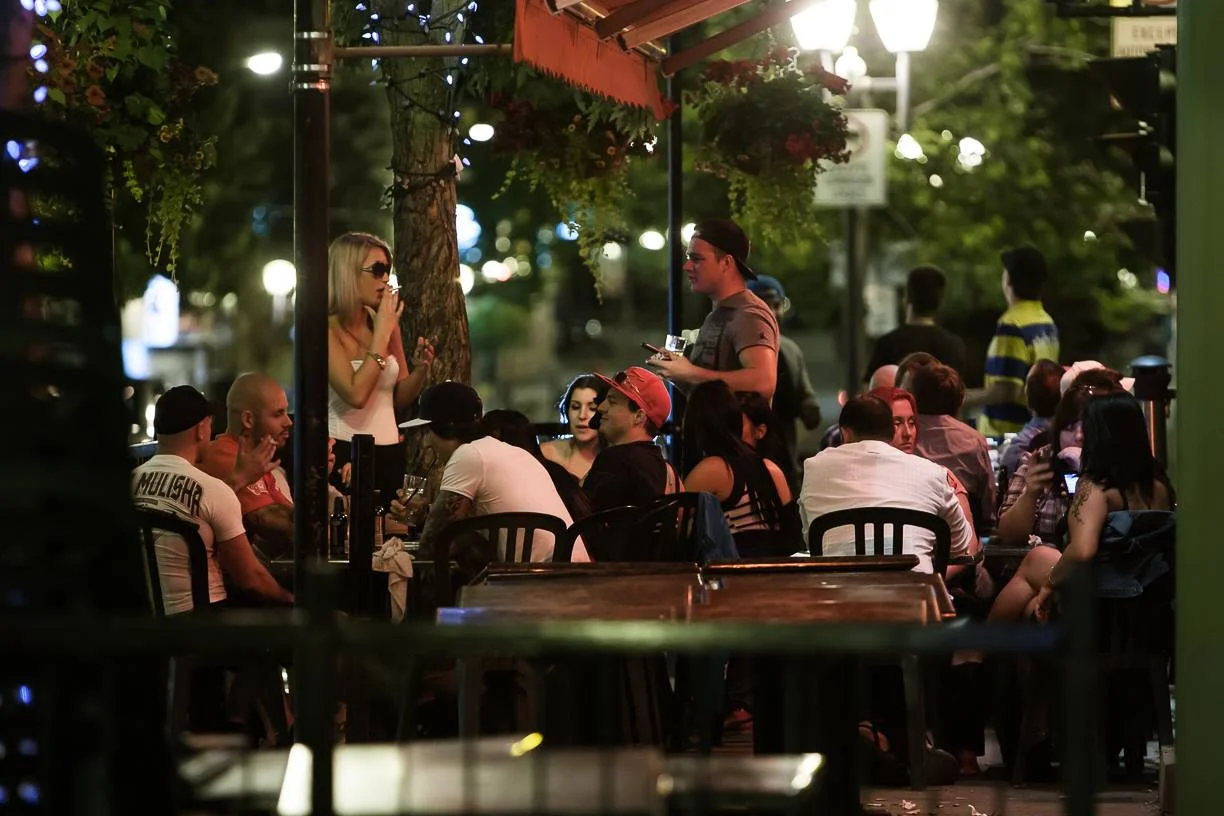
Night street photography holds a unique cinematic aura, transforming mundane locations into mysterious scenes. However, it is precisely in these moments that challenges arise. The lack of light becomes a formidable opponent, turning your images into dark, noisy masses or frustrating motion blurs. Contrast becomes violent between the total darkness of alleys and the brutal glare of neon signs, making the scene complex for your camera's sensor to read. We often find ourselves hesitating, fearing we will miss the decisive moment because the camera seems unable to "see" what our eyes perceive so clearly.
It is crucial to understand that a great night photo depends primarily on your settings and not on your level of theoretical knowledge or years of experience. Many talented photographers feel intimidated by darkness, thinking they must be masters of technique to succeed. This is a mistake. The camera is a logical tool: if you give it the right parameters, it will produce the desired image. The key lies not in complexity, but in understanding how light interacts with your sensor in precarious conditions. Once the basics are set, the camera fades away to make room for your artistic vision.
For the night, forget the fully automatic mode that will desperately try to use flash or smooth out the image. Aperture Priority (Av or A) is often the best starting point, as it allows you to control depth of field while letting the camera suggest a shutter speed. However, for total mastery of luminous chaos, Manual Mode (M) remains king. It allows you to fix a constant exposure, preventing your meter from being fooled by a passing car's headlights. In manual, you decide the atmosphere: do you prefer a dark, dramatic scene or a well-exposed street? This choice is yours from the start.
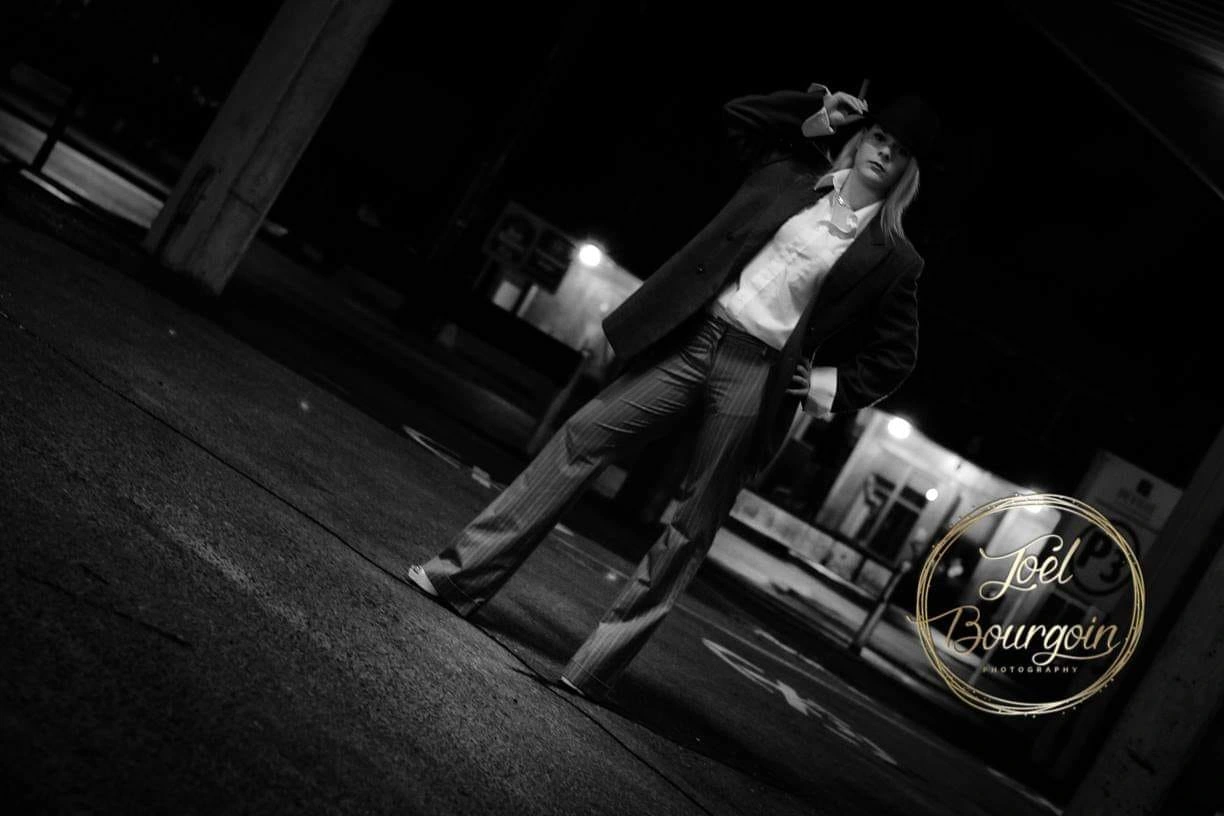
Aperture is your primary lever for letting light in. At night, we generally work "wide open" (the smallest f-number). A wide aperture, such as f/1.8 or f/2.8, is essential for capturing every available photon. Not only does this keep shutter speeds reasonable, but it also creates that superb "bokeh" that isolates your subject from street distractions. Be careful, though: at f/1.8, your focus area is very thin. If your subject moves, the focus must be surgical. It is a constant trade-off between the amount of incoming light and the precision of your focus.
Shutter speed is the setting that defines the dynamism of your street photo.
You come across a hurried passerby under a streetlamp. To freeze their expression and movement without blur, you will need a speed of at least 1/250s. This requires a lot of light or high ISO, but the result is a sharp, precise slice of life.
You are in front of a crossroads with yellow taxis. By dropping to 1/15s or 1/8s, you can follow the movement of the vehicle (panning) or let passersby become ghostly silhouettes while the background remains sharp. This requires a very steady hand or a support point.
ISO is often disliked, but at night, it is your best ally. It is better to have a sharp photo with a bit of grain than a blurry, "clean" photo.
Example 1: In a very dark alley with little lighting, do not hesitate to go up to 6400 ISO. Modern sensors handle noise very well in post-production, and it often gives an interesting "film" look.
Example 2: Under a bright neon sign, you can drop back down to 1600 ISO. The light is more directional and intense, allowing for more texture detail without unnecessary noise.
Street photography is already chaotic; at night, this chaos is decupled. The golden rule is to simplify. Do not try to capture everything. Identify an interesting light source (a storefront, a streetlamp, an advertising sign) and wait for the action to happen at that specific spot. By making the environment predictable, you only have to focus on the subject entering your "stage." It is the fisherman's method: we choose the spot, set the gear, and wait for the fish to pass. This reduces technical stress and increases your chances of success.

The night is a mix of color temperatures: the orange of old sodium streetlamps, the blue of modern LEDs, and the green of fluorescent tubes.
Situation: You are photographing a person in front of a food stand lit by green neons, while the street is bathed in orange. If you leave white balance on auto, the camera may produce strange skin tones. Set it manually (around 4000K-5000K) or shoot in RAW to correct this chromatic chaos later, deciding if you want a warm or cold atmosphere.
Light metering is tricky at night. The camera sees a lot of black and wants to brighten the image, which "blows out" (turns completely white) light sources like neons or lit faces.
Situation: A street musician plays under a powerful spotlight. Use spot or center-weighted metering on their face. This ensures their expression is perfectly exposed, even if the rest of the street turns completely black. It is always easier to recover details in shadows than in completely white, empty highlights.
Stabilization (IBIS or on the lens) is a game-changer for night work. It allows you to gain several stops. By staying steady, elbows against your body, you can drop to surprisingly low speeds (like 1/10s) without a tripod, while keeping a surgically sharp background. It is the ultimate tool for keeping your ISO as low as possible.
Every face is a masterpiece waiting to be documented with dignity. Book your "As I Am" session today on Vancouver Island.
Book your portrait sessionMastering night street photography does not require an innate gift, but a methodical approach to your camera. By accepting that darkness is your playground and not an obstacle, you will discover that appropriate settings are the true brushes of your work. Do not fear high ISO, play with speed to tell a story of movement, and above all, protect your light sources to keep texture in your images. The night city offers scenes of incredible richness to those who know how to configure their gear with simplicity. Go out, practice, and let the light come to you. Your best photos are only a few settings away.